Bootstrap Checkbox Position
Introduction
In certain cases the elementary things might actually become quite important-- specifically once you get to need them. As an example exactly how do your website visitors interact with the pages you create claiming a simple Boolean action-- just yes or no pertaining to a number of the thoughts you need to request, the way they do approve the terms or perhaps line up a handful of the achievable options they might have. We commonly get past this without paying very much of an care to the feature responsible for these sorts of activities yet the Bootstrap Checkbox Position is actually a pretty serious feature-- one our forms just can't actually do without.
Within the most updated fourth edition of the Bootstrap platform we are presented with the
.form-check.form-check-label<div>.form-check.form-check-label<label><input>.form-check-inputEfficient ways to employ the Bootstrap checkbox:
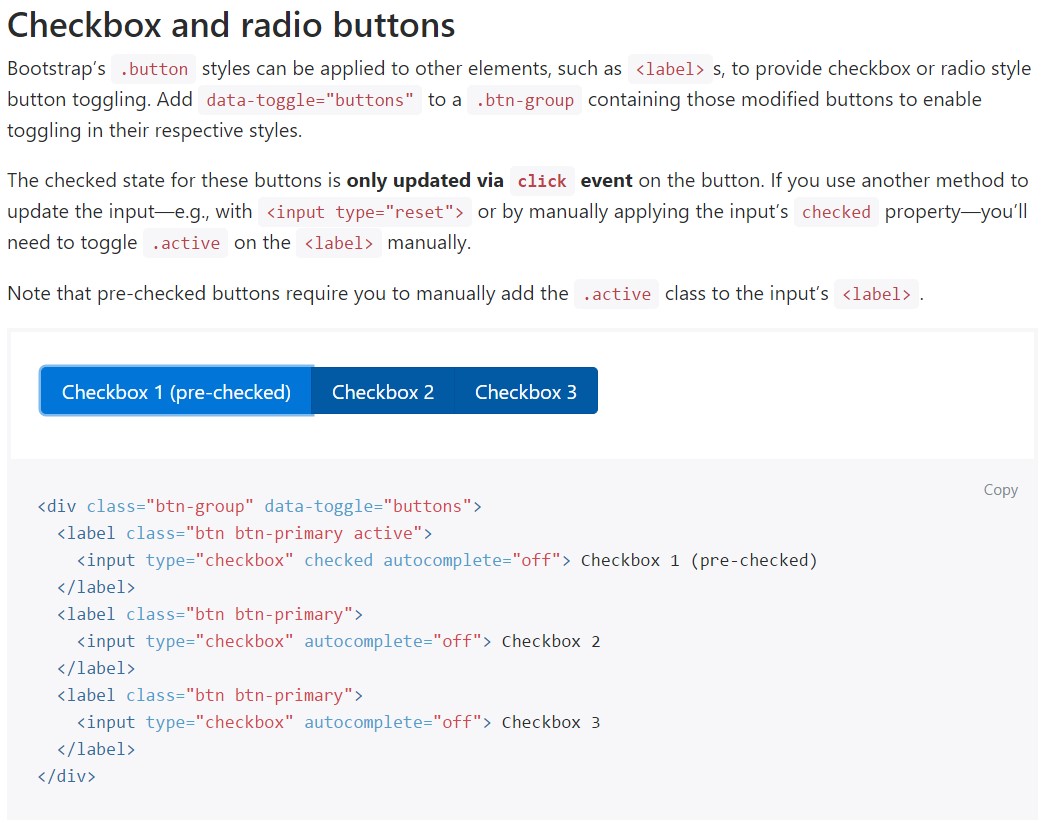
The checked state for these buttons is only updated via click event on the button.

<div class="btn-group" data-toggle="buttons">
  <label class="btn btn-primary active">
    <input type="checkbox" checked autocomplete="off"> Checkbox 1 (pre-checked)
  </label>
  <label class="btn btn-primary">
    <input type="checkbox" autocomplete="off"> Checkbox 2
  </label>
  <label class="btn btn-primary">
    <input type="checkbox" autocomplete="off"> Checkbox 3
  </label>
</div>
Sometimes we need the checkboxes to come within our forms without the site visitor really having the opportunity to get any sort of action clicking them-- that's where the disabled option shows up.
In order to disable effectively a checkbox in Bootstrap 4 using the typical HTML attribute
disabledIn case you appreciate the idea and clearly really want to carry this out you should certainly specify the
.disabled.form-checkOne more good example
When working with checkboxes, wrap them in a
<label>.custom-control.custom-checkboxUtilize
.custom-control-input<input>Also employ two
<span>.custom-control-indicator.custom-control-description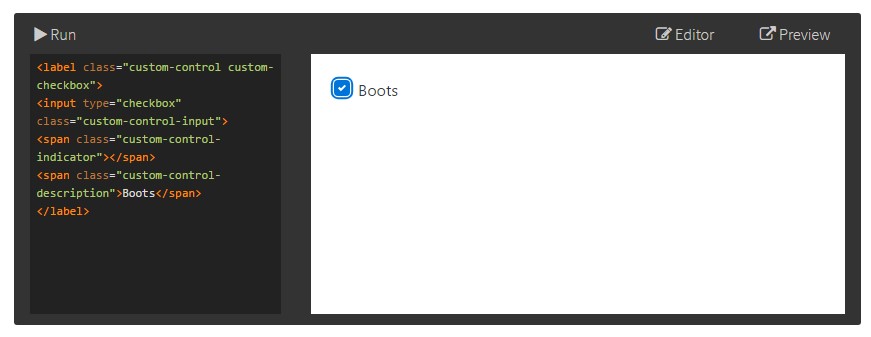
<label class="custom-control custom-checkbox">
<input type="checkbox" class="custom-control-input">
<span class="custom-control-indicator"></span>
<span class="custom-control-description">Boots</span>
</label>
Bootstrap Checkbox Button forms
Default radios and checkboxes are improved upon with the support of
.form-checkThe disabled class is going to additionally lighten the text message colour to help indicate the input's state.
A brand new aspect for the Bootstrap edition 4 framework is the arrival of the so called custom-made form elements. These are actually the similar features we are used to within practicality yet styled even more interesting and also with the Bootstrap manner. With them you have the ability to incorporate certain excitement and charm to your information via just assigning a couple of supplemental classes to the commands you provide in your forms.
If you want to apply custom made checkboxes wrap them in a
<label>.custom-control.custom-checkbox<input>.custom-control-input<span>.custom-control-indicator.custom-control-descriptionConclusions
That's practically everything you should handle in order to insert a checkbox element inside your Bootstrap 4 powered website page and incorporate certain custom flavor to it adding it a tasteful looks. And now all you have to do is repeat the exercise until you've reviewed every one of the checkboxes needed are already on the webpage.
Check out some video training about Bootstrap checkbox
Connected topics:
Bootstrap checkbox approved documentation
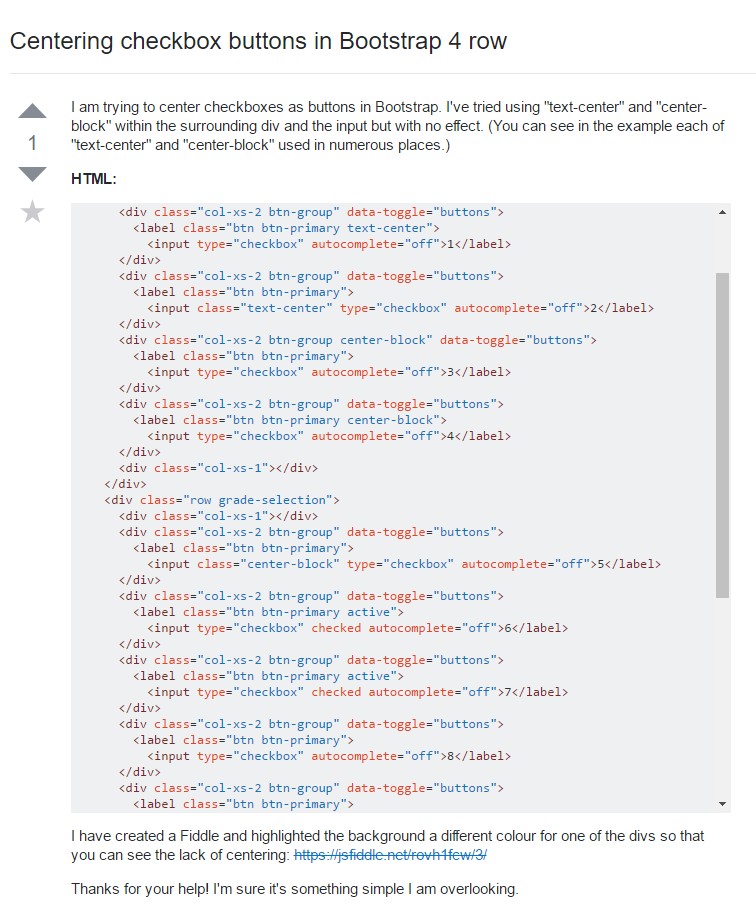
Centering checkbox buttons in Bootstrap 4 row
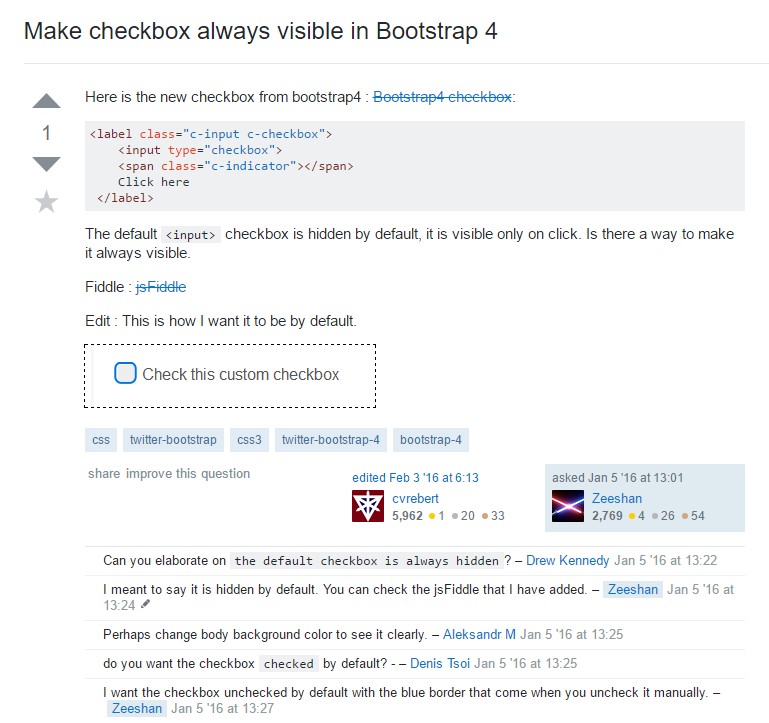
Make checkbox always visible in Bootstrap 4